For Contractors
Setting up your contractor profile
Your profile is your marketing page. Here's how to set it up so managers actually pick you.
Your contractor profile is what property managers see when they're reviewing bids. Set it up properly once and it pays off forever.
How to start
From the main menu, click Add Company. You'll see two tabs at the top:
- Company Registration: for creating a new company profile
- Join Contracting Company: if your company is already on BidMyCommunity and you want to join the existing profile (an existing user from your company has to approve your request)
For first-time setup, stay on Company Registration.
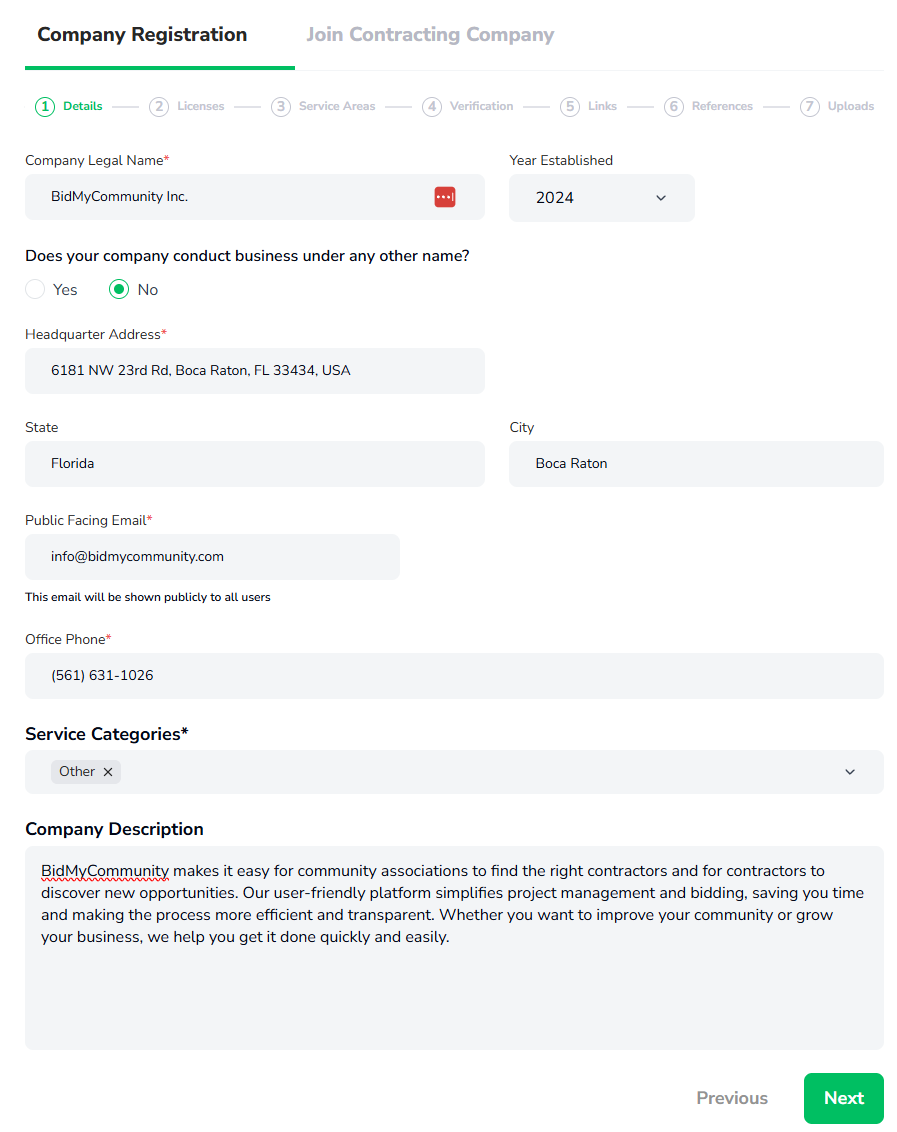
Step 1 — Basic information
Fill in the core company info:
- Company Legal Name: your registered business name
- Year Established
- Doing business name: only if your DBA is different from your legal name
- Headquarter Address: uses Google Places autocomplete, so start typing and pick from the dropdown
- State and City
- Public Facing Email and Office Phone: these are visible to property managers reviewing your bids
- Service Categories: pick all the trades you actually do. Projects in these categories are what get routed to you
- Company Description: add as much detail as possible about who you are and what you do. This is your space to shine.
Step 2 — Licenses
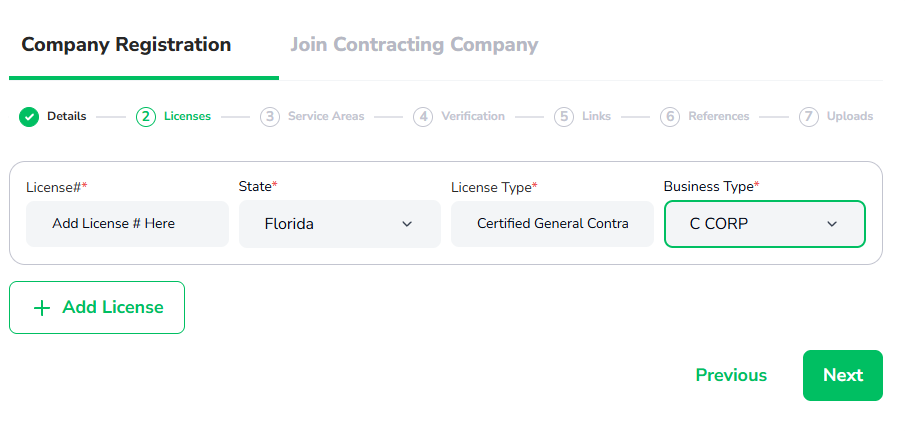
Add every license your company holds. For each license:
- License Number
- State where it was issued
- License Type
- Business Type
You can add multiple licenses if you operate in multiple states or hold different classifications. Click + Add another license to add more rows.
Step 3 — Service areas
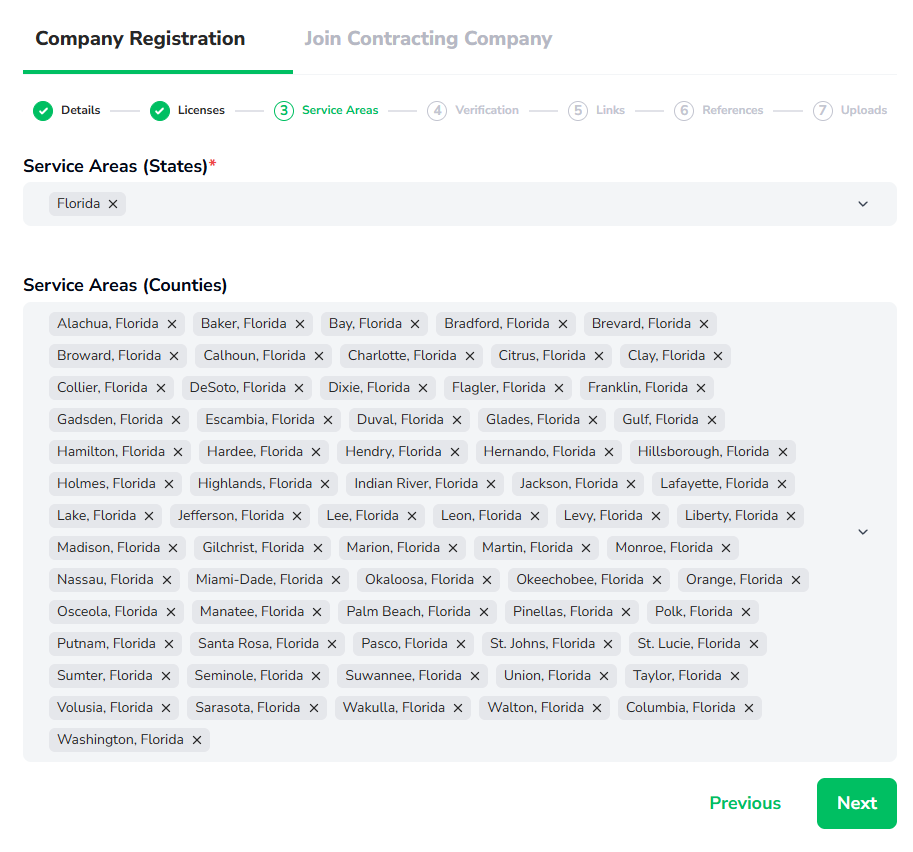 Tell us where you actually take work:
- Service Areas (States): pick every state you serve
- Service Areas (Counties): pick every county you serve.
The platform will route you opportunities based on the state/counties you choose.
Step 4 — Verification
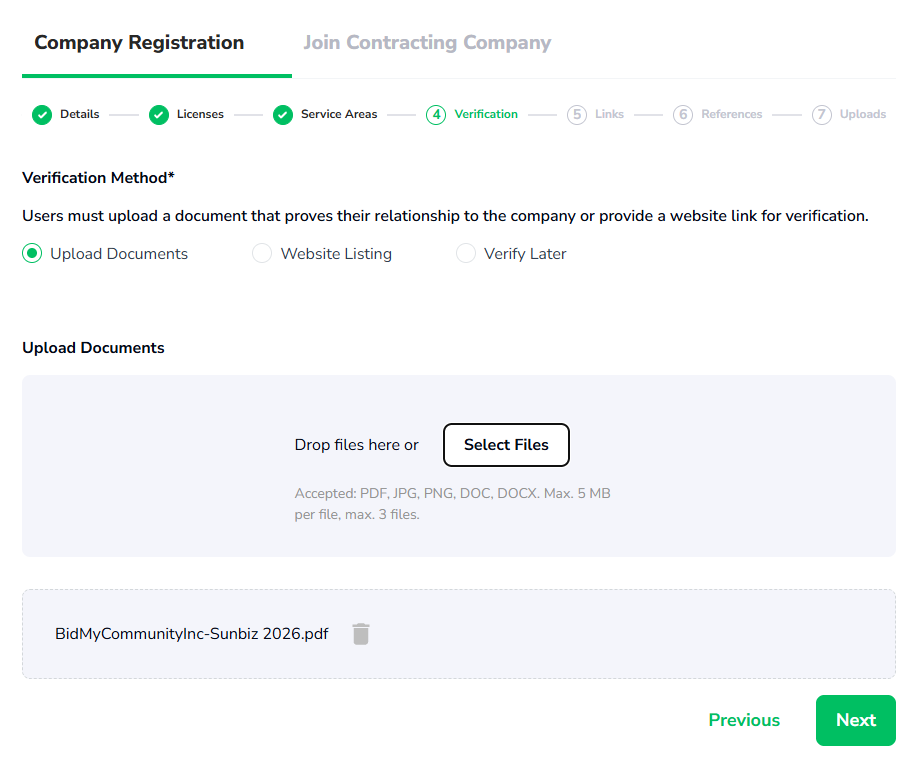 We verify every contractor before they can bid. Pick your verification method:
- Documents: upload proof of business (W-9, certificate of insurance, license PDFs)
- Website: provide your company website URL, and our team verifies it manually
We review all submissions within 1 business day.
Step 5 — Web presence and links
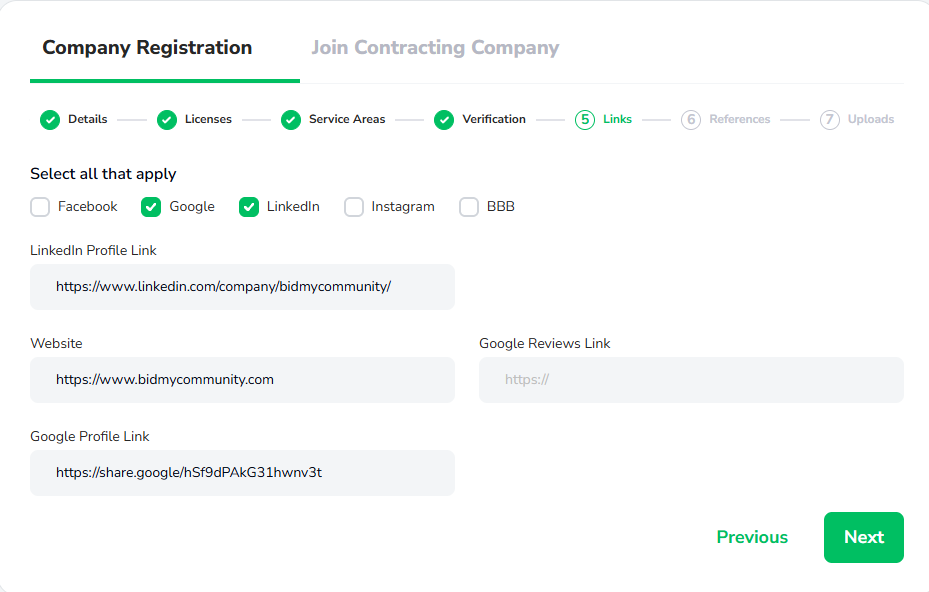 Optional but highly recommended. The more links you add, the more credible your profile looks to managers. Add any of:
- Company website
- Google Business Profile
- Google Reviews
- BBB (Better Business Bureau)
Step 6 — References
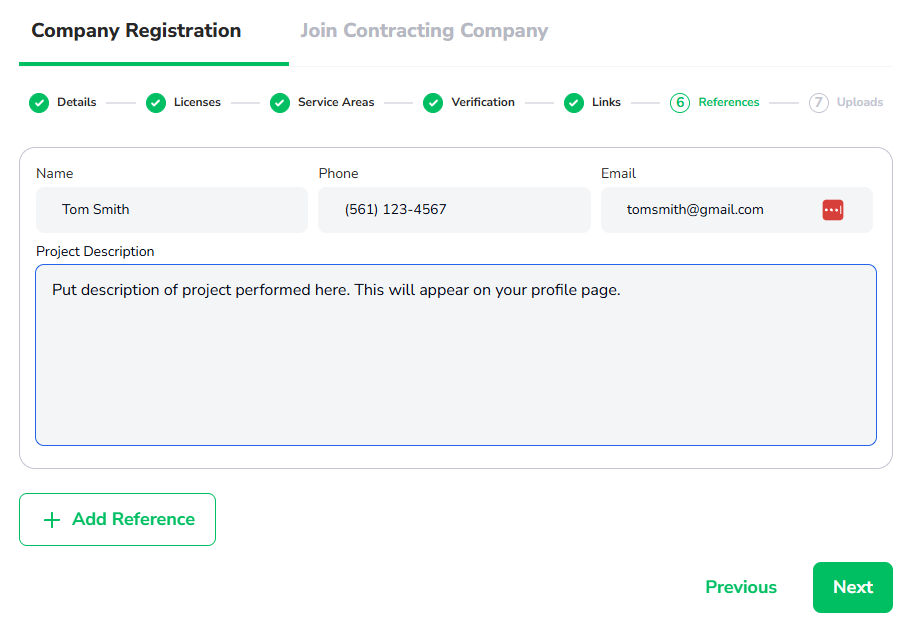 Add 3–5 client references. Property managers do call these. Pick references who'll actually pick up the phone and say good things — ideally other HOA managers, condo boards, or commercial property managers.
Step 7 — Uploads
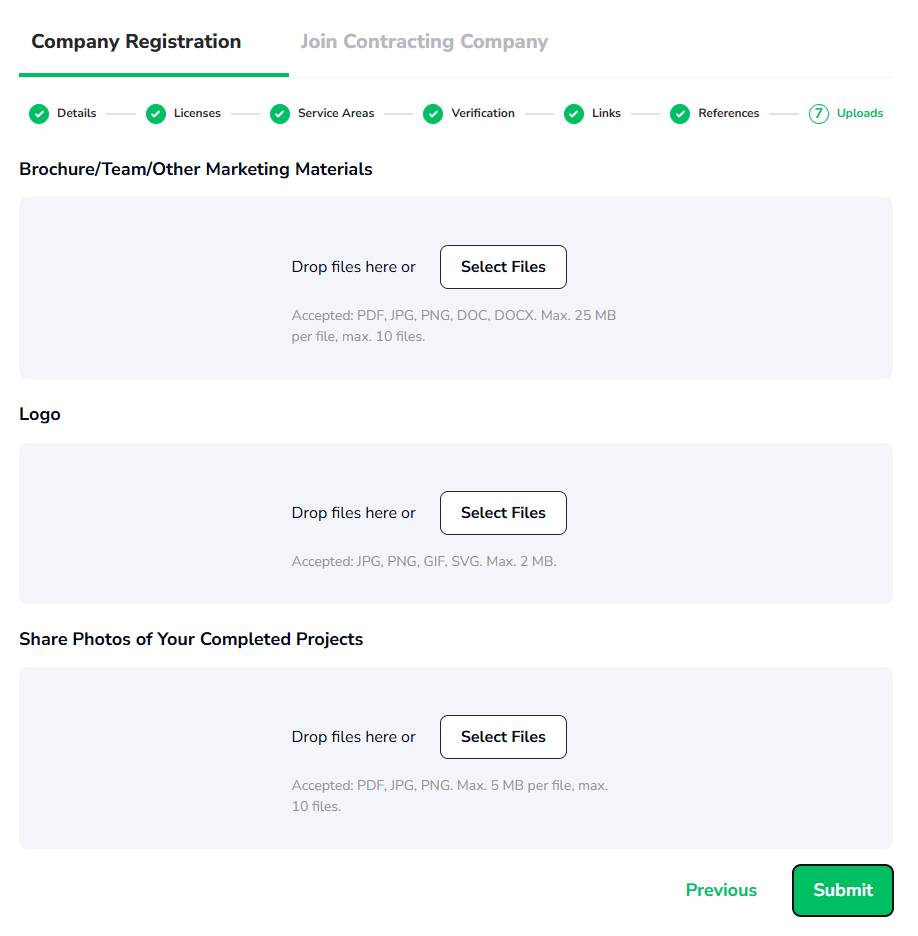 The visual finishing touches:
- Logo — your company logo (PNG or JPG)
- Brochure / Team / Other Marketing Materials — optional company brochure or team bio docs'
- Photos of Your Completed Projects — this is the single biggest differentiator on your profile. Before/after shots stop scrollers cold.
Once you upload, click Submit to send your profile for verification.
After you submit
You'll see a confirmation screen. The BidMyCommunity team reviews your profile and verification documents.
Once approved:
- Your profile becomes visible to property managers
- You start receiving project notifications matching your trades and service area
- You can start bidding
Tip. **Multiple team members?** Your owner or admin can invite other team members to join the company profile via the **Users Management** page. Each person gets their own login but shares the same company profile and bids..
Was this helpful?
Your feedback helps us write better articles.
Thanks — what could we improve?
Optional. Tell us what was missing or unclear.
Thanks for the feedback!
It helps us improve the help center.